Get Data Using JavaScript Fetch API

I was looking for a simple to get data from an API. When I found this tutorial using JavaScript Fetch and the Random User API. You use Fetch to send a simple GET request to the Random User API and provides you with JSON data of 10 random people.

Get Data Using JS Fetch API
Photo by Shopify Partners from Burst

Why manually type in code?

In Learn Ruby: The Hard Way, Zed A. Shaw, explains that you must type in the exercises by hand. It helps you to learn how to read, write and see code. By using copy and paste, you don’t learn how the code works.

How do I used this tutorial

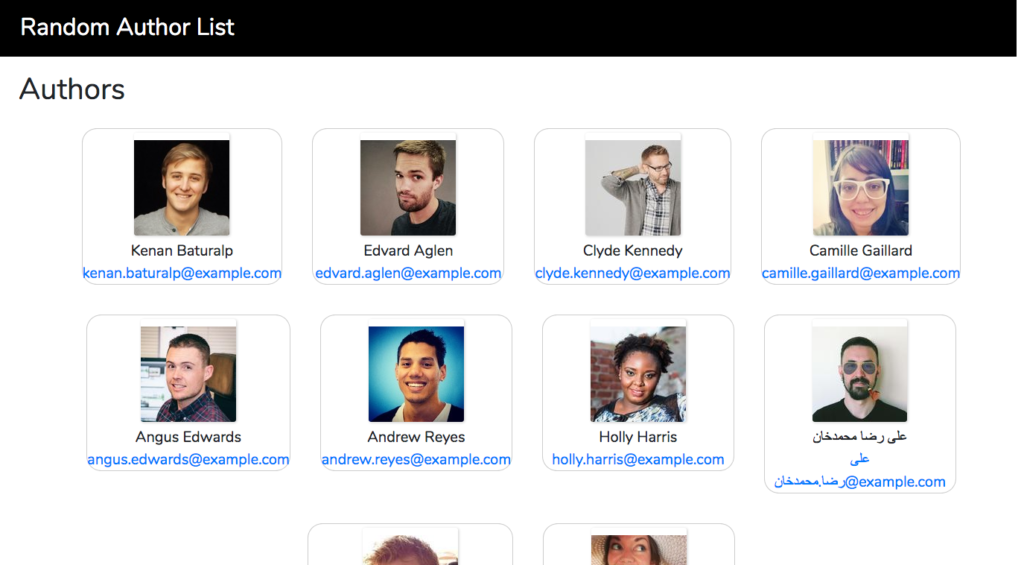
This site is simple. I started with a simple HTML site. Then, I made some adjustments after I got the GET request working.

1. Added style to the website
I started with a simple HTML website that didn’t have much style to it. First, I added CSS code to style the images. Then, I added a header and footer to the site. I decided to stick with a black and white color scheme.

2. Changed how the API displays the data
When I first created the site, the API returns the user’s name in all lower case letters. I wanted the name to follow the format of first letter upper case and the rest lowercase for both first and last name. I modified the JavaScript to capitalize the first letter.

function capitalizeFirstLetter(string) {
    return string.charAt(0).toUpperCase() + string.slice(1);
}

The API returns the email address as text only. I wrote an additional function to change email to be an actually email link.

function createEmailAddress(string) {
    return "<a href=mailto:" + string + ">" + string + "</>";
}

3. Changed the size of the photos
In the tutorial, the photos are on the small size. I wanted them to be bigger. To learn how to do that, I went to the Random User API documentation and read how to get bigger photos. It was a simple change.

Random User API

See more about learning JSON by building a simple website.

How to plan a project?

Projects can be large or small. They can be finished in 24 hours or take months even years to complete. Whether you are working on a project for yourself or a client, you need to create a plan. Your plan can be as simple or detailed as you need it to be. A simple coding plan covers things like what I am going to make, tools I need, steps needed to complete project, sketch out your designs, plan your code and schedule time to work on it.

How To Plan a Project
Photo by Emma Matthews on Unsplash

Decide what to make

The best projects fall somewhere between things that you enjoy doing and things that allow you to learn marketable skills. If you are working on a side project or a hobby, you want to make certain that it has these elements. When you work on client projects, you may not get a project that has both. All projects can provide you with the opportunity to learn something.

Coming up with ideas for personal or side projects can be hard. By keeping a project notebook as Amie Chen does, you’ll have plenty of ideas to choose from. You can also ask your friends what problems they are having or try one of these ideas.

Pick the tools you want to use

Whether you are going to use a new framework or sketching tool, you should make sure that you have everything that you’ll need. Need new software? Install it. Photos? Download or purchase them. Make sure you have what you so you can set up your space for working on your project right away.

Plan the steps to complete your project

When you are first starting a project, it is easy to get excited about it and want to start building right away. Don’t. Plan out your project. Use a process called backwards planning. Start with your end goal. Ask yourself what you want to accomplish and write down clear steps and milestones that you need to achieve this goal. It doesn’t have to be perfect, you can revise as needed later.

What about extra things that you didn’t plan for? You may discover that you need a few extra things. if you are using an API, you may need to sign up for a developer key. Add them to your plan as you learn about them so you don’t forget to do it.

Design

Design is more than making it look pretty. It can be helpful to sketch out your designs before building an app. By sketching it out, you can decide what features to include, how people will use it and how it looks.

Plan your code

Start small. Think about the steps that the user needs to do in order to accomplish something. Break your code down into functions. By breaking it down, you make it easier to write your code.

Schedule time to build it

Look at your schedule and plan time to work on this project. You may need to stop doing less important things like watching TV.