Curiosita Labs

Thoughts on programming, web development and design.

Circuit Board

Basic AI Prompt Tips

Using AI can be both helpful and challenging. You need to know what you want to do before you ask AI to do it. If you don’t, you won’t get the results that you are expecting. Remember that prompting equals writing. The better you get at writing prompts, the better results from AI you’ll receive.

Basic AI Prompt Tips

Image by Muhammad Umar from Pixabay

How to write a basic AI prompt

The way you write your prompts determines the type of results that you get. You need to be specific, concise and direct. Writing a good prompt is both an art and a science. Good prompts are designed.

There are three parts to a basic prompt. Task, context and references. For the task, consider what you want the AI to do.

  • Do you want to write an email?
  • Write some code?
  • Or create a picture of a scary pumpkin?

Then, you may want to add a role or persona to your prompt. Ask it to think like a developer or editor.

For the context, determine what type of output you want. Be direct and concise.

Write a blog post on the three best ways to learn the coding language Python.

You may want to add references. Provide the AI with more examples or documents. Try using please and thank you to get better results.

Evaluate the Output

Treat the AI like an intern. Review and check its work. Ask yourself:

  • Is the output accurate?
  • Is the output biased?
  • Does it have enough information?
  • Is the output relevant to the project or task?
  • Is it consistent if I use the same prompt multiple times?

Refine the prompt

When you don’t get the results you expect, you’ll need to refine the prompt.

  • Try different words to describe what you want.
  • Revise the prompt to use shorter sentences. Or break it into individual sentences.
  • Introduce constraints. Add more details to narrow the type of results that you get.
  • Use one of these 9 Useful AI Prompts if you need more ideas.
  • Or try a prompt from Microsoft’s Copilot Prompt Gallery.

More tips on writing basic AI prompts

Simple Image Gallery with FlexBox and Popup Modal

Lots of websites have image galleries. You’ll see them on news sites, e-commerce and blogs. They vary in size and shape. You can build them with HTML and CSS. If you want more functionality, you can add JavaScript to add a popup modal. Or Lightbox effect.

Image Gallery with Pop-Up

Make Your Own Gallery

  1. Gather 8 or more images
  2. Write the HTML code to structure your gallery
  3. Add CSS to style the gallery
  4. Write JavaScript to show and close the modal

1. Gather Your Images

An image gallery is incomplete without images. You can use your own photos or download Stock Photos. For this project, I used photos I downloaded for my blog. My favorite Stock Photo sites are:

2. Write the HTML Code to Structure the Gallery

Structuring the code is an important step. I used the HTML elements figure and figcaption to layout each image.

<div class="gallery">
          <figure>
            <img src="images/close-up-of-motherboard.jpg" alt="Motherboard" onclick="openModal(this.src)">
            <figcaption class="text-center caption-text">
              Motherboard
            </figcaption>
          </figure>
</div>

3. Add CSS to Make Look Like a Gallery

With CSS, you can arrange your images in a grid-like format. FlexBox allows you to arrange elements in a flexible grid.

.gallery {
    display: flex;
    flex-wrap: wrap;
    gap: 1em;
}

The HTML elements made it easy to create a card design. Where the image is on top and description on the bottom half. This is also a common design pattern in image galleries.

4. Write JavaScript to Show and Close Modal

I wanted to have the image popup in a modal or Light-box when I clicked on it. A Light-box dims the rest of the page. Places the selected image on top of the page. It includes an ‘X’ button to close. I used JavaScript to open and close the modal.

function openModal(src) {
    let modal = document.getElementById('modal');
    let modalImg = document.getElementById('modal-img');
    modal.style.display = 'flex';
    modalImg.src = src;
}

function closeModal() {
    let modal = document.getElementById('modal');
    modal.style.display = 'none';
}

Making It Responsive

FlexBox changes the grid to a column on mobile devices. If you don’t size your images correctly, they can create performance issues. And display incorrectly on mobile devices. I used CSS to make the images fit.

img {
    max-width: 100%;
    vertical-align: middle;
    height: auto;
  }

Summary

Image gallery are simple to make. You can use them to showcase photos or open recipes and news stories. How you build them depends on the purpose that you need. This pop-up modal could be better by adding functionality to scroll through each of the images. An update for a later version.

Related Articles On Programming Apps

Creating a simple weather app with Open Weather API

Updated on January 31, 2025

How do you get the weather? You could use an app or create your own. First, you need a way to get weather data. You can use an Application Programming Interface to get the data that you need.

Creating a simple weather app with Open Weather API

Where can you find APIs to use in your projects? Try ProgrammableWeb. It is an API directory that lets you find the right API for your project. I found a weather API called Open Weather. Open Weather allows you to get the current weather data, hourly or daily forecast and more.

With Open Weather, I created a simple weather app. It gets the current temperature, daily forecast (highs and lows) and weather conditions. Then, it tells you if the weather was right for riding a bike.

Getting Started

Before writing any code, I looked at Open Weather’s documentation. It explains how to use their API. They include examples using different programming languages like JavaScript. These examples are helpful were helpful to learn what I could do with the API.

On their examples’ page, I found Weather.js. Weather.js fetches data from Open Weather for you. It makes it easy to get weather information from Open Weather.

Building the App

Before building the app, I researched other weather apps to get an idea of what I wanted mine to look like. Then, I sketched out an idea on paper.

I chose to use HTML, CSS and JavaScript. Since I am familiar with Bootstrap, I used it as well. I built my prototype with Bootstrap’s starter template. Then, I wrote my own JavaScript file to fetch data from Open Weather using Weather.js.

Open Weather has weather icons. Weather.js doesn’t use those icons. I looked at the JavaScript and wrote code to get the icons.


Weather.Current.prototype.icon = function () {
  return this.data.list[0].weather[0].icon;
}

Now, my app shows the current and forecast temperatures, weather icon and conditions.

Bike Weather App Screenshot

Why update?

The version of Bootstrap was old. I wanted to add a feature to get the visitor’s location and display where they are from. It would get the weather forecast for their location. Instead of getting the weather for Milwaukee, WI.

Changes to Bootstrap

The previous version had a feature called Jumbotron. Bootstrap 5 has dropped this component. You can use Bootstrap’s utilities to recreate the look. The layout is a bit different from the original.

Bike Weather Banner

To display the forecast, I used Bootstrap cards. Then, I used FlexBox to make the cards the same height. Bootstrap has a helper to create a sticky footer.

Reverse Geocoding

One option to get your local weather is to use the City and State. In the first version, I hardcoded it. Open Weather has another API for getting your browser’s location. You can do a reverse geocode lookup. HTML has a utility for getting the users location.


function getLocation() {
    if (navigator.geolocation) {
      navigator.geolocation.getCurrentPosition(function(position){
          const longitude = position.coords.longitude;
          const latitude = position.coords.latitude;
          const geoURL = "http://api.openweathermap.org/geo/1.0/reverse?lat=" + latitude + "&lon=" + longitude + "&limit=1&appid=" + Weather.APIKEY;
  
          fetch(geoURL)
            .then(response => response.json())
            .then(data => {
              let cityName = data.map(a => a.name);
              let state = data.map(a => a.state);
              document.getElementById("location").innerHTML = cityName + ", " + state;
              console.log(data);
            })
            .catch(error => {
              console.error('Error fetching data:', error);
              document.getElementById("location").innerHTML = "Milwaukee, Wisconsin";
            });
        })
    } else {
        document.getElementById("location").innerHTML = "Milwaukee, Wisconsin";
    }
  }

By getting the location and doing a reverse lookup, I was able to modify the code. It now gets the forecast based on the user’s location. In web development, updating the code to a new version helps you to develop better solutions. Sometimes updating the CSS framework helps you to build a better user experience.

Articles on Programming Apps

Why you need to use software customizations

Software needs to be adaptable. Not all software has everything that you need to make it work for your business. It should provide you with tools for modifying the software to fit your unique business needs. Business needs change. Your software should be able to change with your needs.
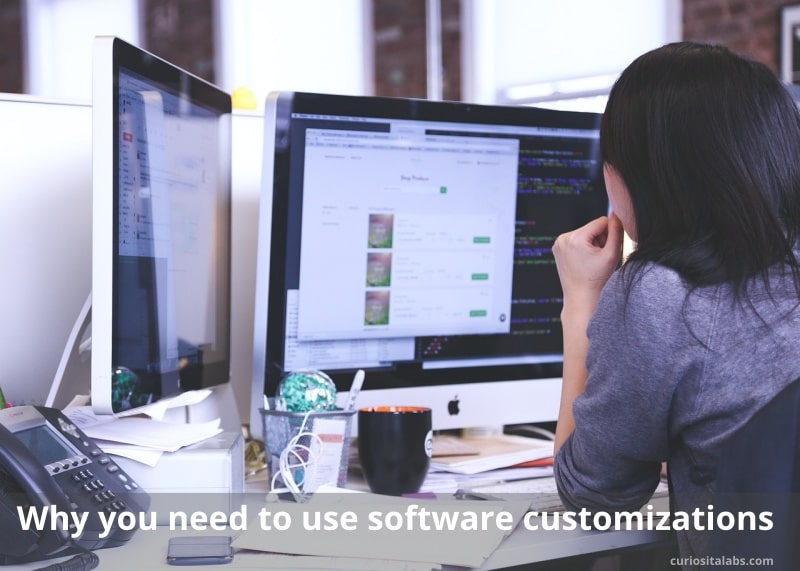
How do you make your software adapt to you needs?

You make your software adapt by customizing it. Software customizations range from simple adjustments to more complex updates and connections. You customize by tweaking settings, adding new or missing features, changing how things work or linking with other tools. The three ways to customize software are configuration, extension and customization.

How do you define configuration, extension and customization?

  • Configuration: A set of finite choices that you make to control the behavior of the software. You may tweak settings, change branding options and add items that are unique to your business.
  • Extension: You decide to add third-party products (plug-ins, apps or extensions) to your software. These products extend the functionality of the software by implementing features that don’t natively exist in the software.
  • Customizing: You may write your own extension to fit your business needs. You choose to do this because you can’t find an app that does what you needs. Or an existing app no longer does what you need it to do. Many software vendors provide you with tools like APIs so you may add what’s missing from their software.

Staying adaptable with software customizations

Too many customizations can affect performance of your software. You need to pick the right type and amount of customizations for your business needs. You stay adaptable by maintaining your software with updates. Review all configurations, extensions and customizations every year. Technology changes quickly. You’ll need to adapt to these changes.

Restart Numbered List with CSS

Normally, you can renumber an HTML ordered list. You use the attribute “start” to set the value you want to restart the numbers at. What happens when you have a special style that overrides how the numbers are generated?

Restart Number Lists with CSS

Image by Alicja from Pixabay

For example, I use the following CSS style to override how a list looks.

ol.simple-list {
	counter-reset: li-counter;
	list-style-type: none;
	list-style-type: decimal !ie;
	margin: 0;
	margin-left: 3em;
	padding: 0;
}


It creates a list with numbers like this.

Green Numbered List

When I tried to use the start attribute to restart numbering a list, it set all of the numbers to 1. I tried to update the style with newer CSS styling. It didn’t fix the problem. Finally, I found the right way to make this work. The attribute “counter-increment” lets you reset the counter. You have to pick a number one less than what you want to start at.

.simple-list-counter-9 {
	counter-increment: li-counter 9;
}

By doing this, you can restart your list at the desired number. With the above style the new list starts at 10 instead of 1. This works if all your lists end at number 9. If you want to restart at a different style, I suggest using an in-line style instead of adding it to your CSS file.

Page 1 of 52

Powered by WordPress & Theme by Anders Norén