Thoughts on programming, web development and design.

Circuit Board

Category: Programming Page 23 of 27

Programming

Milwaukee WordCamp 2012

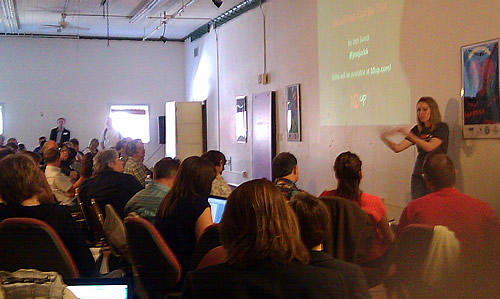
On June 2nd and 3rd, the first Milwaukee WordCamp 2012 was held at Bucketworks.org, a co-working space, located in downtown Milwaukee. Milwaukee WordCamp offered two different tracks: User and Developer. As a developer, I focused on the developer sessions. My favorite sessions were WordPress Plugins, How to Contribute to Open Source and How Not to Design like a Developer.
WordCamp Milwaukee 2012
Each presentation had something new to learn about WordPress and development.

  • Writing Your First Plug-In: Brad Parbs demonstrated how easy it is to create your first plug-in. He showed us that you can create your first one in five minutes.
  • WordPress Development Practices: Dan Pastori explained how to write a plug-in, plug-in best practices and how to test them. He even suggested having your mom test your plug-in. If she can’t figure out how to use it, then no one can.
  • Contribute to Open Source: Joel Clermont explained that open source communities needs your help to keep making it better. You can contribute to open source for “selfish reasons”: make your life easier, gain valuable experience and further your career. You can get involved in WordPress by writing documentation, fixing bugs or even testing.
  • How to Not Design Like A Developer: Tracy Apps spoke on how to design attractive looking sites. She emphasized the use of Contrast, Color, Balance and Alignment. The purpose of design is about problem-solving not just making things look pretty.

If you missed a presentation, WordCamp Milwaukee has published the presentation slides.

Code Challenge

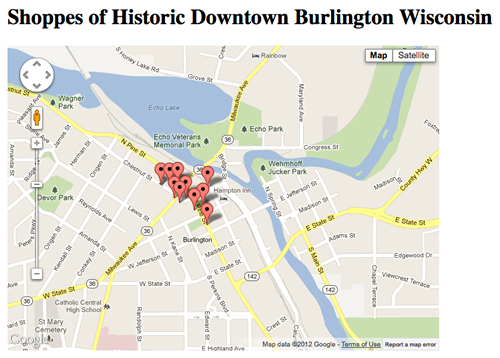
Fred Boyle challenged developers to build something, an app, in a language that they don’t normally use. Normally, I program in ASP.Net, C# and MS-SQL. For this code challenge, I decided to learn more about Google Maps and JavaScript.

I used a tutorial on jQuery and Google Maps as a starting point. Google Maps is now on version 3, not version 2 (which the tutorial uses). I picked the locations from a paper map that shows some shops in downtown Burlington, Wisconsin.

While developing the page, I ran into two issues: Missing Marker and Multiple InfoWindows not displaying.

Missing Marker
I had 11 shops and only 10 were showing up on the map. After removing most of the locations, I got the missing one to show up. I discovered that two shops share the same location (building) which means they have the same longitude and latitude. In order to show both, I had to change to code to place both shops on the same marker.

Multiple InfoWindows not displaying
I wanted to add InfoWindows so you could learn a little more about the shop. With Google Maps API V3, I ran into a problem with multiple InfoWindows. It would only show the last InfoWindow, no matter which marker I clicked on. After researching Google, I found Google Maps API V3 Multiple Markers, Multiple Infowindows. Colin Wiseman walks you through the problem and provides you with a solution. I used his solution to fix this issue.

Simple and Quick Lightbox with CSS and jQuery

Computer with codeI found a simple and quick tutorial on building a lightbox. In Super Simple Lightbox with CSS and jQuery, you learn how to build a really simple lightbox. This lightbox tutorial is quick and easy to implement. They walk you through the HTML markup, CSS and jQuery. By following the steps, you can get the lightbox working in no time. Faster, if you decide to download the source files.
jQuery and a Responsive Footer

Computer CodingSome footers have a simple design. They have navigation and copyright. Other footers are more informative. In Developing a Responsive Website: The Footer, Scott Stanton shows you a footer design that has three sections: navigation, tweets and contact info. The format of this footer is simple and informative. It doesn’t overwhelm you with too much information. It simply directs you to information that you may need to learn quickly about this site. He used HTML5 and CSS to build the footer.

In part 2, Scott takes it further by adding jQuery and responsive design. Creating a Responsive Website: The Footer Part 2 breaks the process down into two parts. First, you learn how to create and add the twitter feed. Then, he shows you how to change the CSS to make the footer more responsive.

This two part tutorial shows you how to incorporate jQuery and responsive design into one section of your website. By focusing on one section of your site, you can learn what works and then apply it to the rest of the site. Small changes can be easier to do than over-hauling an entire website. Sometimes you can learn a lot when you start with a small change.

jQuery and Google Maps

While looking for jQuery tutorials that were more challenging than the typical beginner tutorials, I found marcgrabanski.com. His now defunct developer blog has a few tutorials on jQuery. Computer with codeMarc posted one on Google Maps and jQuery. This tutorial had exactly what I was looking for. It showed a practical use for jQuery instead of how to create an animated box. Marc walks you through a step by step process of using jQuery with Google Maps. He shows you how to mashup jQuery with Google Maps to create a simple map that overwrites Google Map popups.

If you are learning jQuery and want to try a tutorial that is more challenging and fun, I suggest taking a look at jQuery and Google Maps.

Page 23 of 27

Powered by WordPress & Theme by Anders Norén